We were embracing the winter which had announced itself with a few cold days and a heated gas market. A good moment to tinker with the heating system in our house. We have a Buderus gas boiler driven by a not-so-smart thermostat and we were silently complaining about it for a long time anyway. So, why not update this system, make it smart, and save some gas (a.k.a. money) along the way!? Which started as a small project to simply install a smart heating system turned into an endeavour that aroused my pride as a computer guy and tinkerer. It kept me busy for weeks.
If you're just interested in triggering the boiler, you can skip the story and jump right in the middle.
The journey begins
In the beginning, it looked so easy...
tado and no tado
Our first instinct was to install a smart heating system. We chose tado which offers smart radiator knobs and a thermostat controlling the boiler. Knobs and thermostat are communicating with each other. As soon as the room cools down a certain temperature, the boiler is turned on.
The system works pretty well, but it has a significant flaw. It has to be connected to the internet. Yes, the system can be controlled via HomeKit which is a protocol to organize communication in the local network. You can even make HomeAssistant taking over controlling the radiator knobs and the thermostat in the local network. In theory that means you could let a firewall prevent internet access for tado devices and have Home Assistant communicating with the setup in your local network. However, the system doesn't let you control the hot water via HomeKit. There is no way to get the hot water entities of the thermostat to show up in Home Assistant. To control the hot water, the tado system needs an internet connection.
But why using a centralized service via the internet just to control the boiler in our house? There had to be a better way!
EMS Bus
After extensive googling, I stumbled upon EMS-ESP. It is a microcontroller firmware that communicates with EMS-based equipment like thermostats, boilers, and the like. EMS stands for Energy Management System and manufacturers like Bosch, Buderus, Nefit, Junkers, Worcester, and Sieger use it in their applicances. It is basically a protocol for communication between, for example, a boiler and a thermostat.
Luckily, you can buy a neat device called EMS Bus Gateway that ships with the EMS-ESP firmware. It connects to the service port of the boiler and your home network.
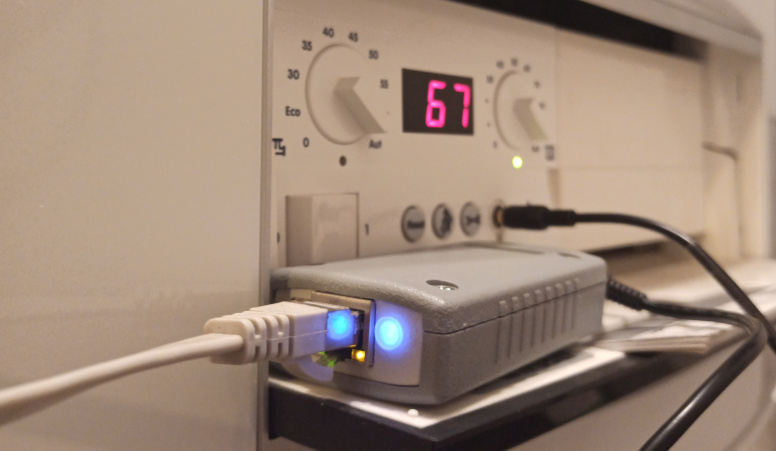
The EMS Bus Gateway connects your boiler to the home network
The best part: all the functionality can be controlled from Home Assistant! It needs a MQTT server like Mosquitto in between, but that can set-up quickly via a docker container. Once that is up and running, the thermostat and boiler show up in Home Assistant and you can control your boiler from there.
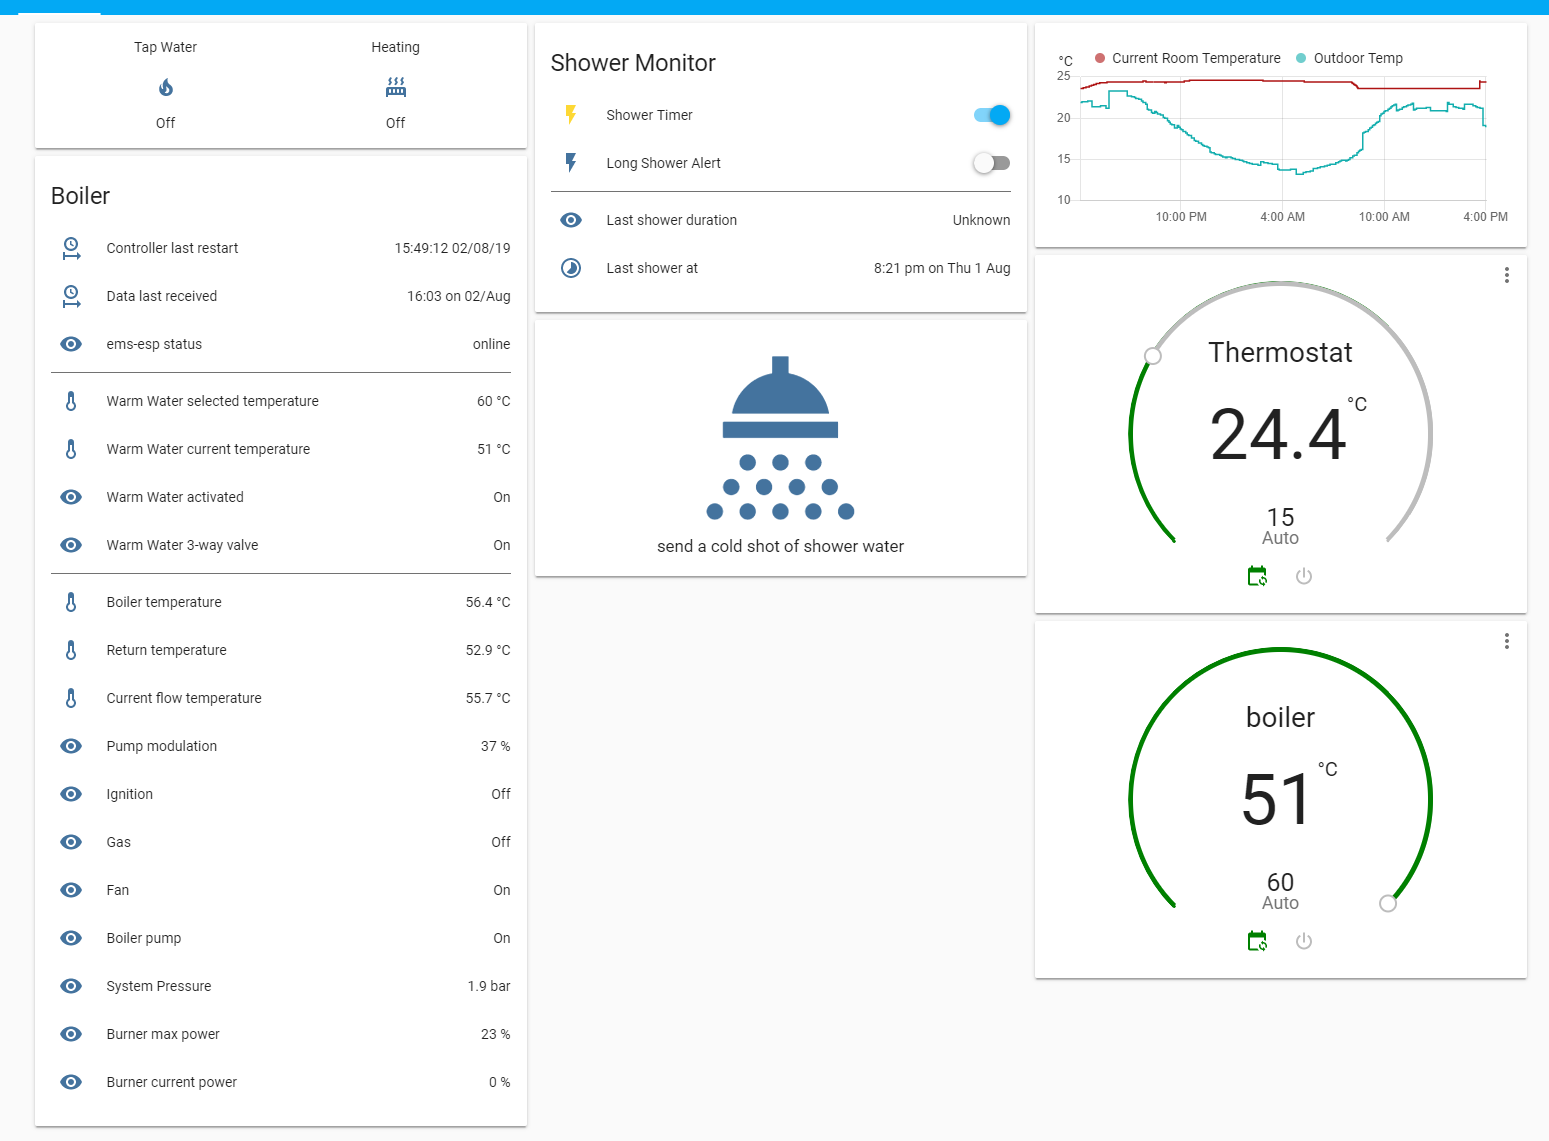
Control your boiler from within Home Assistant! The image is relentlessly stolen from the BBQKees Documentation
EMS Bus and tado
Now, this sounds like the perfect combination, right? The tado thermostat communicates with the radiators and controls the boiler, and via the EMS Bus Gateway, we can take control of the hot water! Fantastic!
Of course, it doesn't work that way. The tado thermostat is pretty bossy and overwrites everything that is sent on the EMS Bus... Argh!
So, that meant switching back to the old RC35 Buderus thermostat and mimicking tado's smart functionality in HA.
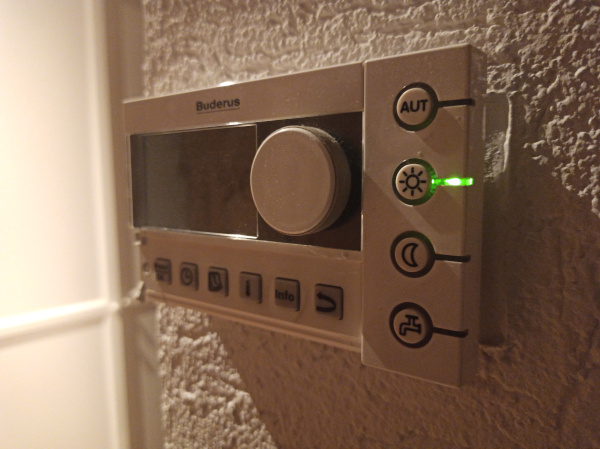
The ancient Buderus RC35 thermostat. The dust is there for reasons.
Home Assistant for smart heating
My setup consists of these elements:
- A script that turns the boiler on and off
- A script that toggles the temperature setting on the smart radiator knobs
- A few helpers to ease setting up heating schedules and fine-tuning temperature settings
Let's go through this list in reversed order.
Accessible helpers
So, first of all, I defined four temperature levels: away, sleep, home, and comfort. In HA, these are just input_numbers. Then, there is a switch that toggles heating on and off. These helpers are accessible via a UI:
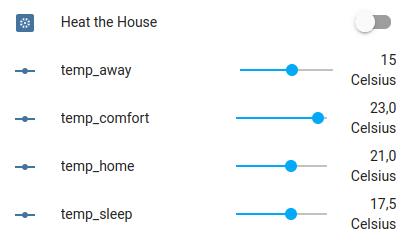
My helpers in Home Assistant. The switch controls heating and the sliders let me adjust temperature settings for temperature levels
Then, there is a card that allows me to select the temperature level in each room. It is an input_select for each room that has the four temperature levels as choices.
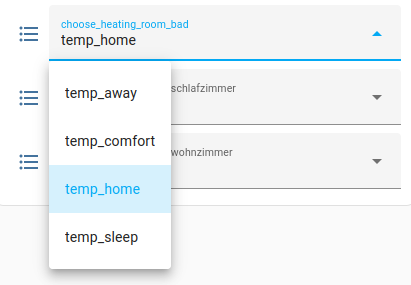
Another helper in Home Assistant to choose a temperature level for each room.
With these things, I can set up the temperature level in a room, control the actual temperature, and toggle the heating on and off.
Toggle radiator knobs
Before we can actually start heating, the radiator knobs need to turn on. So, there is a first script that toggles thermostat settings:
alias: Toggle Thermostat Settings
description: ""
variables:
  home_temp: "{{states('input_number.temp_home')|float}}"
  sleep_temp: "{{states('input_number.temp_sleep')|float}}"
  away_temp: "{{states('input_number.temp_away')|float}}"
  comf_temp: "{{states('input_number.temp_comfort')|float}}"
  bad_temp: |
    {% if is_state('input_select.choose_heating_room_bad', 'temp_away') %}
      {{away_temp}}
    {% elif is_state('input_select.choose_heating_room_bad', 'temp_home') %}
      {{home_temp}}
    {% elif is_state('input_select.choose_heating_room_bad', 'temp_sleep') %}
      {{sleep_temp}}
    {% elif is_state('input_select.choose_heating_room_bad', 'temp_comfort') %}
      {{comf_temp}}
    {% endif %}
  water_state: |
    {% if is_state('input_boolean.all_at_home','off') %}
      'off'
    {% elif is_state('input_boolean.heat_the_house','on') %}
      'on'
    {% else %}
      'auto'
    {% endif %}
sequence:
  - device_id: XXX
    domain: climate
    entity_id: climate.heizung_bad
    type: set_hvac_mode
    hvac_mode: heat
  - choose:
      - conditions:
          - condition: state
            entity_id: input_boolean.all_at_home
            state: "off"
        sequence:
          - service: climate.set_temperature
            data:
              temperature: "{{away_temp}}"
            target:
              entity_id: climate.heizung_bad
      - conditions:
          - condition: state
            entity_id: input_boolean.heat_the_house
            state: "on"
        sequence:
          - service: climate.set_temperature
            data:
              temperature: "{{bad_temp}}"
            target:
              entity_id: climate.heizung_bad
    default:
      - service: climate.set_temperature
        data:
          temperature: "{{sleep_temp}}"
        target:
          entity_id: climate.heizung_bad
  - service: mqtt.publish
    data:
      topic: ems-esp/thermostat
      payload_template: "{\"cmd\":\"wwmode\", \"data\":{{water_state}}}"
  - delay:
      seconds: 1
  - service: mqtt.publish
    data:
      topic: ems-esp/thermostat
      payload_template: "{\"cmd\":\"wwcircmode\", \"data\":{{water_state}}}"
  - delay:
      seconds: 3
  - condition: template
    value_template: "{{ is_state('select.thermostat_dhw_mode', water_state) }}"
  - condition: template
    value_template: "{{ is_state('select.thermostat_dhw_circulation_pump_mode', water_state) }}"
  - service: switch.turn_on
    data: {}
    target:
      entity_id: input_boolean.toggle_thermostat_settings_script_success
mode: single
First of all, the script collects the four temperature levels from the input_number fields. Then, the temperature level for the room is updated in the variable bad_temp based on the corresponding input_select. The actual sequence of the script then defines three cases.
When heating is on (i.e. the heat_the_house-switch is on), the chosen temperature is set. When heating is off, the sleep-level is chosen. That ensures the room doesn't cool too much if we're out for working during the day. If we're away for holidays, the room can further cool down (as you can see, this requires another switch all_at_home which can toggle even more stuff).
And, of course, the script sets the hot water! The if conditions in the definition section of the variable and the choose-action might be a bit weird. But having the desired state of water in a variable water_state allows the template condition to check if the setting the value was successful.
Then, a hidden helper toggle_thermostat_settings_script_success is toggled. If this script is called in an automation, we can do something like this:
alias: "Heat the House: Toggle Theromstats!"
description: ""
trigger:
  - platform: state
    entity_id:
      - input_boolean.heat_the_house
  - platform: state
    entity_id:
      - input_boolean.all_at_home
condition: []
mode: single
action:
  - service: input_boolean.turn_off
    data: {}
    target:
      entity_id: input_boolean.toggle_thermostat_settings_script_success
  - repeat:
      while:
        - condition: state
          entity_id: input_boolean.toggle_thermostat_settings_script_success
          state: "off"
      sequence:
        - service: script.toggle_thermostat_settings
          data: {}
        - delay:
            hours: 0
            minutes: 0
            seconds: 30
            milliseconds: 0
That basically ensures that the script finishes all its tasks and restarts if required. I noticed the communication to the radiator knobs being a little buggy sometimes. So if it doesn't succeed, the automation can execute it again. Also, I'm not sure if the MQTT packages might collide with packages from other scripts.
Anyway, as you can see, the automation is triggered as soon as the heat_the_house-switch is toggled. I found this the most elegant way to trigger updating the radiator knobs, because it executes if the switch is toggled manually or through a schedule (i.e. another automation that just switches the switch at a certain point in time).
With the radiator knobs opening valves, we can now trigger the boiler to actually send some hot water.
Control the boiler
The basic idea here is that the boiler should still be controlled using the Buderus thermostat. From what I read, it is not easy to get a boiler do the right thing efficiently. And the Buderus thermostat does a fair job, so let's use it.
However, for the boiler to turn on when required, we need to trick the thermostat into thinking it needs to do something. Because that was how the whole thing started: Once the thermostat measures the target temperature where it hangs, the entire heating is turned off no matter if you're freezing in all the other rooms. That means, without modifications, the entire heating circuit depends on a single point of measurement. With the smart thermostats, we now have a sensor in each room and we want to put them to good use.
So, the trick here is to adjust the target temperature at the thermostat and recalibrate the thermostat's internal temperature sensor so that it thinks it is way cooler than it actually is. But we only do that if the measured temperature is below the target temperature in any room.
An example: The target temperature in the bathroom is 23° Celsius, but we measure only 17° there. The target temperature at the thermostat is 20° but it already measures 20°. Normally, you would now stick to the toilet seat with freezer burn. But we adjust the sensor's internal offset with the difference between the highest target temperature and the lowest measured temperature (we just need to ensure that we do not exceed the offset's range of values of -5/+5). Then, we update both the target temperature for the Buderus thermostat AND the internal offset. So, for our example, the thermostat thinks, it should reach 23° but it has only 15°: the temp_difference is -6.0, so the temp_offset is -5.0. The thermostat itself measured 20°, so it thinks it has 20°-5.0 = 15° instead of 23°.
This motivates the thermostat to heat up the boiler. The smart radiator knobs ensure that only those rooms experience heating that need it. And voilá, we have our heating system controlled in Home Assistant. This is the script:
alias: Heizung Toggle Boiler
mode: single
description: Turn on Boiler if coolest room temperature below max set
variables:
  target_temp: |-
    {{ [
      state_attr('climate.heizung_bad', 'temperature')|float(0),
      state_attr('climate.heizung_schlafzimmer', 'temperature')|float(0)
      ] | max }}
  min_temp: >-
    {{ [
      states('sensor.heizung_bad_current_temperature')|float(100),
      states('sensor.heizung_schlafzimmer_current_temperature')|float(100)
      ] | min }}
  home_temp: "{{states('input_number.temp_home')|float}}"
  sleep_temp: "{{states('input_number.temp_sleep')|float}}"
  away_temp: "{{states('input_number.temp_away')|float}}"
  temp_difference: "{{ '%0.2f' % (min_temp - target_temp) }}"
  temp_offset: "{{ [temp_difference , -5.0] | max }}"
  heating_required: >-
    {{states('sensor.heizung_bad_current_temperature')|float <
    state_attr('climate.heizung_bad', 'temperature')|float(0) or
    states('sensor.heizung_schlafzimmer_current_temperature')|float <
    state_attr('climate.heizung_schlafzimmer', 'temperature')|float(0)}}
sequence:
  - service: mqtt.publish
    data:
      topic: ems-esp/thermostat
      payload_template: "{\"cmd\":\"intoffset\", \"data\":0.0}"
  - delay:
      seconds: 1
  - choose:
      - conditions: "{{heating_required}}"
        sequence:
          - service: mqtt.publish
            data:
              topic: ems-esp/thermostat
              payload_template: "{\"cmd\":\"intoffset\", \"data\":{{ temp_offset }}}"
          - delay:
              seconds: 1
          - service: mqtt.publish
            data:
              topic: ems-esp/thermostat
              payload_template: "{\"cmd\":\"seltemp\", \"data\":{{ target_temp }}}"
          - delay:
              seconds: 1
          - service: mqtt.publish
            data:
              topic: ems-esp/thermostat
              payload_template: "{\"cmd\":\"daytemp\", \"data\":{{ target_temp }}}"
          - delay:
              seconds: 1
          - service: mqtt.publish
            data:
              topic: ems-esp/thermostat
              payload: "{\"cmd\": \"mode\", \"data\": \"day\"}"
      - conditions:
          - condition: state
            entity_id: input_boolean.all_at_home
            state: "off"
        sequence:
          - service: mqtt.publish
            data:
              topic: ems-esp/thermostat
              payload: "{\"cmd\": \"mode\", \"data\": \"night\"}"
          - delay:
              seconds: 1
          - service: mqtt.publish
            data:
              topic: ems-esp/thermostat
              payload_template: "{\"cmd\":\"seltemp\", \"data\":{{ away_temp }}}"
          - delay:
              seconds: 1
          - service: mqtt.publish
            data:
              topic: ems-esp/thermostat
              payload_template: "{\"cmd\":\"nighttemp\", \"data\":{{ away_temp }}}"
      - conditions:
          - condition: or
            conditions:
              - condition: state
                entity_id: input_boolean.working_home
                state: "on"
              - condition: state
                entity_id: input_boolean.heat_the_house
                state: "on"
        sequence:
          - service: mqtt.publish
            data:
              topic: ems-esp/thermostat
              payload: "{\"cmd\": \"mode\", \"data\": \"day\"}"
          - delay:
              seconds: 1
          - service: mqtt.publish
            data:
              topic: ems-esp/thermostat
              payload_template: "{\"cmd\":\"seltemp\", \"data\":{{ home_temp }}}"
          - delay:
              seconds: 1
          - service: mqtt.publish
            data:
              topic: ems-esp/thermostat
              payload_template: "{\"cmd\":\"daytemp\", \"data\":{{ home_temp }}}"
    default:
      - service: mqtt.publish
        data:
          topic: ems-esp/thermostat
          payload: "{\"cmd\": \"mode\", \"data\": \"night\"}"
      - delay:
          seconds: 1
      - service: mqtt.publish
        data:
          topic: ems-esp/thermostat
          payload_template: "{\"cmd\":\"seltemp\", \"data\":{{ sleep_temp }}}"
      - delay:
          seconds: 1
      - service: mqtt.publish
        data:
          topic: ems-esp/thermostat
          payload_template: "{\"cmd\":\"nighttemp\", \"data\":{{ sleep_temp }}}"
As you can see, there is some other stuff happening. But that is just to update the Buderus thermostat temperature levels.
That script is self-contained. We don't use any templates or other helpers. Adding rooms is just a matter of copy-&-pasting a few lines of codes for the target_temp, the min_temp, and the heating_required variable. It looks a little bulky for multiple rooms, but that's how it is - it's YAML and the benefit is that it is very explicit.
Anyways, this script is executed every minute in a simple automation:
alias: Trigger Boiler
description: ""
trigger:
  - platform: time_pattern
    minutes: /1
condition: []
action:
  - service: script.boiler_turn_on
    data: {}
mode: single
We don't use a helper here that catches the successful execution of the script in this one. The script is triggered every minute so if it fails one or two times, we don't really care.
Implement heating schedules
Scheduling heating is now just a matter of toggling the heat_the_house switch. This can be done in a simple time-based automation like this:
alias: "Heat the House: On"
description: ""
trigger:
  - platform: time
    at: "06:00:00"
condition:
  - condition: state
    entity_id: input_boolean.all_at_home
    state: "on"
action:
  - service: input_boolean.turn_on
    data: {}
    target:
      entity_id: input_boolean.heat_the_house
mode: single
Equivalently, the switch is turned off in the evening. When we're not on holidays, the heating setting goes into sleep-mode and in away-mode otherwise.
The schedule can also be implemented using a CalDAV calendar integration of Home Assistant: https://www.home-assistant.io/integrations/caldav//. That is pretty cool, because you can schedule heating times as events in a regular calendar, like a Google calendar, and simply let the calendar switch toggle the heat_the_house switch:
alias: "Heat the House: Toggle by Calendar Heating"
description: ""
trigger:
  - platform: state
    entity_id:
      - calendar.heating_heating
condition: []
action:
  - if:
      - condition: state
        entity_id: input_boolean.all_at_home
        state: "on"
    then:
      - choose:
          - conditions:
              - condition: state
                entity_id: calendar.heating_heating
                state: "on"
            sequence:
              - service: input_boolean.turn_on
                data: {}
                target:
                  entity_id: input_boolean.heat_the_house
          - conditions:
              - condition: state
                entity_id: calendar.heating_heating
                state: "off"
            sequence:
              - service: input_boolean.turn_off
                data: {}
                target:
                  entity_id: input_boolean.heat_the_house
mode: single
EMS-ESP commands
In case you want to read up on the available commands to send to the thermostat, you could refer to the EMS-ESP documentation. However, I can't find the comprehensive list of commands that was there before. So, here is a copy of that list that works with EMS-ESP Version v3.5.0b7:
boiler

    heatingActive = Heating active
    tapwaterActive = Warm water/DHW active
    serviceCode = Service Code
    serviceCodeNumber = Service code number
    wWSelTemp = Warm water selected temperature
    wWSetTemp = Warm water set temperature
    wWDisinfectionTemp = Warm water disinfection temperature
    selFlowTemp = Selected flow temperature
    selBurnPow = Burner selected max power
    curBurnPow = Burner current power
    heatingPumpMod = Heating pump modulation
    pumpMod2 = Heating pump modulation
    wWType = Warm water type
    wWChargeType = Warm water charging type
    wWCircPump = Warm water circulation pump available
    wWCircMode = Warm water circulation pump freq
    wWCirc = Warm water circulation active
    outdoorTemp = Outside temperature
    wWCurTemp = Warm water current temperature (intern)
    wWCurTemp2 = Warm water current temperature (extern)
    wWCurFlow = Warm water current tap water flow
    curFlowTemp = Current flow temperature = current flow temperature of water leaving the boiler
    retTemp = Return temperature
    switchTemp = Mixer switch temperature
    sysPress = System pressure
    boilTemp = Max boiler temperature
    wwStorageTemp1 = Warm water storage temperature (intern)
    wwStorageTemp2 = Warm water storage temperature (extern)
    exhaustTemp = Exhaust temperature
    wWActivated = Warm water activated
    wWOneTime = Warm water one time charging
    wWDisinfecting = Warm water disinfecting
    wWCharging = Warm water charging
    wWRecharging = Warm water recharging
    wWTempOK = Warm water temperature ok
    wWActive = Warm water active
    burnGas = Gas
    flameCurr = Flame current
    heatingPump = Heating pump
    fanWork = Fan
    ignWork = Ignition
    wWHeat = Warm water heating
    heatingActivated = Heating activated
    heatingTemp = Heating temperature setting on the boiler
    pumpModMax = Boiler circuit pump modulation max power
    pumpModMin = Boiler circuit pump modulation min power
    pumpDelay = Boiler circuit pump delay time
    burnMinPeriod = Boiler burner min period
    burnMinPower = Boiler burner min power
    burnMaxPower = Boiler burner max power
    boilHystOn = Boiler temperature hysteresis on
    boilHystOff = Boiler temperature hysteresis off
    setFlowTemp = Set Flow temperature
    wWSetPumpPower = Warm water pump set power
    mixerTemp = Mixer temperature
    tankMiddleTemp = Tank Middle Temperature (TS3)
    wwBufferBoilerTemperature = Warm water buffer boiler temperature
    wWStarts = Warm water # starts
    wWWorkM = Warm water active time
    setBurnPow = Boiler burner set power
    burnStarts = Burner # starts
    upTimeControl = Operating time control
    upTimeCompHeating = Operating time compressor heating
    upTimeCompCooling = Operating time compressor cooling
    upTimeCompWw = Operating time compressor warm water
    heatingStarts = Heating starts (control)
    coolingStarts = Cooling starts (control)
    wWStarts2 = Warm water starts (control)
    nrgConsTotal = Energy consumption total
    auxElecHeatNrgConsTotal = Auxiliary electrical heater energy consumption total
    auxElecHeatNrgConsHeating = Auxiliary electrical heater energy consumption heating
    auxElecHeatNrgConsDHW = Auxiliary electrical heater energy consumption DHW
    nrgConsCompTotal = Energy consumption compressor total
    nrgConsCompHeating = Energy consumption compressor heating
    nrgConsCompWw = Energy consumption compressor warm water
    nrgConsCompCooling = Energy consumption compressor total
    nrgSuppTotal = Energy supplied total
    nrgSuppHeating = Energy supplied heating
    nrgSuppWw = Energy supplied warm water
    nrgSuppCooling = Energy supplied cooling
    maintenanceMessage = Code for maintenance H03-time, H08-date, etc.
    maintenance = Type of scheduled maintenance Time in hours or date

solar

    collectorTemp = Collector temperature (TS1)
    tankBottomTemp = Tank bottom temperature (TS2)
    tank2BottomTemp = Second Tank bottom temperature (TS5)
    heatExchangerTemp = Heat exchanger temperature (TS6)
    solarPumpModulation = Solar pump modulation (PS1)
    cylinderPumpModulation = Cylinder pump modulation (PS5)
    pumpWorkTime = Pump working time (min)
    pumpWorkTimeText = Pump working time as Text
    energyLastHour = Energy last hour
    energyToday = Energy today
    energyTotal = Energy total
    solarPump = Solar Pump (PS1) active
    valveStatus = Valve status
    tankHeated = Tank heated
    collectorShutdown = solarPump shutdown when tankBottomTemp reached tankBottomMaxTemp
    tankBottomMaxTemp = Maximum tankBottomTemp temperature setting
    collectorMaxTemp = Maximum collector temperature setting
    collectorMinTemp = Minimum collector temperature setting

mixer

    wWTemp = Current warm water temperature
    pumpStatus = Current pump status
    tempStatus = Current temperature status
    flowTemp = Current flow temperature
    flowSetTemp = Setpoint flow temperature
    valveStatus = Valve position in %

heatpump

    airHumidity = Relative air humidity
    dewTemperature = Dew temperature point

thermostat

    datetime = Date & Time
    display = Display (RC30 only)
    language = Language (RC30 only)
    offsetclock = Offset clock (RC30 only)
    brightness = Display Brightness (RC30 only)
    backlight = Keyboard lightning (RC30 only)
    mixingvalves = Number of mixing valves (RC30 only)
    heatingpid = PID setting (RC30 only)
    preheating = Preheating in clock program (RC30 only)
    offtemp = Temperature in mode "Off"
    dampedoutdoortemp = Damped outdoor temperature = the thermostat damps changes to the actual outside temperature to mirror the thermal mass of the building. Building Type setting changes the time constant of the damping
    inttemp1 = Temperature sensor 1
    inttemp2 = Temperature sensor 2
    intoffset = Offset int. temperature sensor
    minexttemp = Min ext. temperature
    building = Building type (light,medium, heavy)
    wwmode = Warm water mode
    wwtemp = Warm water upper temperature
    wwtemplow = Warm water lower temperature
    wwextra1 = Onetime for circuit 1 started
    wwcircmode = Warm Water circulation mode
    floordry = Floordrying started
    floordrytemp= Temperature for floordrying

per thermostat heating circuit:

    seltemp = Setpoint room temperature
    currtemp = Current room temperature
    heattemp = Heat temperature
    comforttemp = Comfort temperature
    daytemp = Day temperature
    ecotemp = Eco temperature
    nighttemp = Night temperature
    manualtemp = Manual temperature
    holidaytemp = Holiday temperature
    nofrosttemp = Nofrost temperature
    heatingtype = underfloor, radiator etc.
    targetflowtemp = Target flow temperature = flow temperature calculated by the thermostat as required to get the target room temperature given current conditions (usually a combination of heat curve and external temp and, possibly, current room temp)
    offsettemp = Offset temperature, heating curve at roomtemperature
    designtemp = Design temperature, heating curve at minexttemp
    roominfluence = Influence of roomtemperature in outdoorcontrolled circuits
    flowtempoffset = Offset for boiler in mixed circuits
    minflowtemp = Flowtemperature lower limit
    maxflowtemp = Flowtemperature upper limit
    summertemp = Summer temperature
    summermode = Summer mode
    reducemode = How temperature is set in night/eco mode:
    program = timer program selection
    controlmode = thermostat control by outdoortemperature or roomtemperature
    mode = Mode
    modetype = Mode type